¿Por qué una tienda de alta tecnología se paraliza cuando falla una máquina importante? Cada minuto de inactividad del husillo cuesta beneficios y sobrecarga los compromisos de entrega. Una fresadora de 3 ejes o un centro de torneado pueden costar cientos de dólares por hora.
El tiempo de inactividad es costoso una vez que se prolonga. Lo bueno es que la mayoría de las fallas tienen patrones predecibles. Si se aprenden esos patrones y se actúa de forma consistente, se puede reanudar la producción en cuestión de horas en lugar de días.
Esta guía le proporciona un mapa completo de la solución de problemas de las máquinas CNC. Descubrirá las causas, reparará los defectos y evitará que vuelvan a ocurrir. CNC Centro de mecanizado vertical De Yangsen se mantienen tolerancias estrictas incluso en tiradas de producción largas.

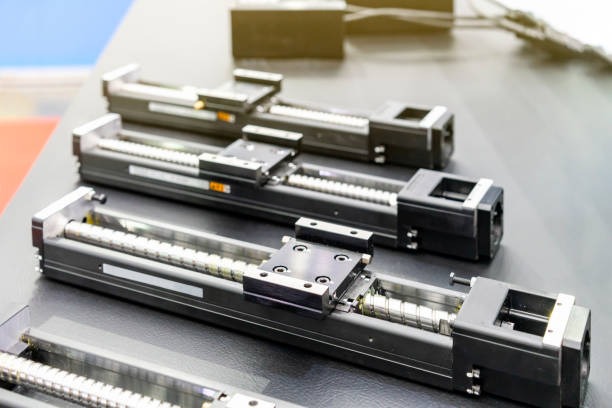
Un centro de mecanizado está montado sobre una base robusta de hierro fundido o acero. Esta base amortigua las vibraciones y soporta las guías, que permiten el desplazamiento de la mesa en los ejes X, Y y Z. Los husillos de bolas están fijados a cada motor de eje y permiten que la mesa o el cabezal se muevan mediante movimiento rotatorio o recto. El carro se mantiene alineado mediante guías lineales o guías de cajón.
La máquina gira alrededor del husillo. Este recoge la herramienta, gira a alta velocidad y debe mantenerse rígido. Un husillo común es un rodamiento de cerámica o acero relleno de grasa o con una mezcla de aceite y aire. Un cambiador automático de herramientas (ATC) cambia las herramientas sin la ayuda del operador. En una fresadora, puede ser un carrusel o una cadena. En un torno, suele ser una torreta.
Bloquee la alimentación. Desconecte el interruptor principal y coloque un candado. Drene el aire de las líneas. Coloque una etiqueta que advierta a otros que no deben arrancar la máquina. No confíe únicamente en el paro de emergencia del control. Centro de mecanizado horizontal le permite cortar varias caras en una configuración y aún así mantener el tamaño.
● Observa y escucha. Cables sueltos, olor a quemado, goteo de refrigerante o pintura descascarada suelen indicar problemas.
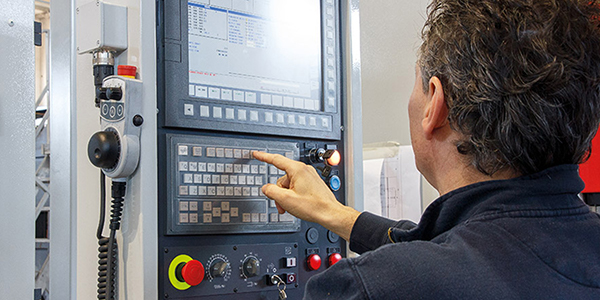
● Consulte la página de diagnóstico del control. Registre el voltaje, la carga del eje, la carga del husillo, la presión de aceite y la presión de aire.
● Anote todas las alarmas activas y pasadas. Muchos controles almacenan las últimas 100 alarmas; desplácese por ellas para detectar patrones.
Un método formal supera las conjeturas. Los 5 porqués funcionan bien:
1. Por qué ¿Se detuvo el eje? Porque se activó una alarma del servoaccionamiento.
2. Por qué ¿Se disparó la alarma? Porque la corriente subió.
3. Por qué ¿Se disparó la corriente? Porque la corredera se atascó.
4. Por qué ¿Se atascó? Los chips están empacados en las tapas.
5. Por qué ¿Se empaquetó el paquete de papas fritas? Porque las tapas estaban rotas y no se volvieron a colocar.
Anote la fecha, el síntoma, la causa raíz, las piezas utilizadas y el tiempo empleado. Un registro sencillo ayuda al siguiente técnico a resolver la misma falla más rápidamente. También muestra patrones que pueden indicar una falla de diseño o la necesidad de capacitación.
|
Falla |
Síntoma que ves |
Primer control |
Posible solución |
|
Sin encendido |
Pantalla oscura, sin luces. |
Disyuntor principal y fusibles |
Reinicie el disyuntor o reemplace el fusible quemado |
|
Reinicios aleatorios |
El control se reinicia durante los cortes |
Medir el voltaje de línea |
Estabilizar la energía o instalar un SAI |
|
Alarma de sobrecarga del eje |
El eje se detiene con un fuerte zumbido. |
Chips en camino cubiertas |
Virutas transparentes y guías de lubricación |
|
Sobrecalentamiento del husillo |
La nariz está demasiado caliente para tocarla |
Comprobar el flujo de refrigerante |
Limpiar los filtros y restablecer el flujo |
|
Mal acabado superficial |
Líneas visibles en la pieza |
Desplazamiento del soporte |
Reemplazar o equilibrar el soporte |
|
Rotura de herramientas |
El cortador se rompe a mitad del corte |
Valores de avance y velocidad |
Reducir las rpm, aumentar el avance por diente |
|
Deriva de posición |
El tamaño crece a lo largo del día. |
Aumento de la temperatura del husillo de bolas |
Limpie las líneas de lubricación y enjuague el aceite |
|
Herramienta atascada en el husillo |
La barra de tiro no se suelta |
Manómetro de presión de aire |
Aumente la presión o repare la fuga |
|
Alarma de error del codificador |
Axis no estará en casa |
Conexión a tierra del blindaje suelta |
Apriete o reemplace el cable |
|
Baja presión de sujeción |
Puestos de cambio de paletas |
Mirilla de nivel hidráulico |
Rellene el aceite y purgue el aire. |
Los controles CNC necesitan un voltaje estable con un margen de error de ±5 %. Use un multímetro de verdadero valor eficaz para leer cada pata. Si una pata falla, los variadores podrían reiniciarse o el control podría bloquearse. Revise la alimentación de la planta y luego busque terminales sueltos en la caja principal. Reemplace los disyuntores desgastados y considere un estabilizador de voltaje si la energía de la red eléctrica fluctúa con frecuencia.
Inspeccione los cables de alimentación para detectar grietas en el aislamiento. Las marcas de calor bajo una terminal indican una conexión suelta. Apriete al par de apriete indicado por el fabricante. La falta de conexión a tierra permite que el ruido penetre en el control y dificulta la localización de fallas aleatorias. Mida la resistencia desde el bastidor de la máquina hasta la conexión a tierra de la planta; debe ser inferior a un ohmio.
Si el circuito de parada de emergencia no se desbloquea, rastree cada interruptor y relé con un multímetro. El agua o el refrigerante dentro de un interruptor de puerta pueden cortocircuitar los contactos. Reemplace los botones de parada de emergencia de plástico baratos si se atascan. En máquinas antiguas, la bobina del relé puede fallar; cámbiela por una pieza en buen estado.
● Los supresores de sobretensiones en todas las fases protegen los variadores de los impactos de rayos.
● Una pequeña fuente de alimentación ininterrumpida mantiene el control activo el tiempo suficiente para estacionar los ejes en caso de pérdida de energía.
● Etiquete cada interruptor y fusible para que los técnicos del turno de noche puedan actuar rápidamente.
Instale un medidor de vibraciones de bolsillo en la carcasa del husillo. Compare las lecturas con las especificaciones del fabricante. Una vibración alta suele deberse a:
● Desequilibrio: Portaherramientas no equilibrados para altas rpm.
● Cinturones sueltos: Las correas desgastadas o flojas golpean las poleas.
● Desgaste del cojinete: Las bolas o carreras picadas crean un gruñido.
Corrija el desequilibrio utilizando portaherramientas equilibrados y extrayendo las virutas de las boquillas de refrigerante. Apriete o cambie las correas. Si el ruido del rodamiento persiste, retire el husillo para reconstruirlo antes de que la excentricidad dañe las piezas. Cuando las piezas grandes requieren cortes pesados, Centro de mecanizado de pórtico Le brinda la rigidez y el alcance para cumplir con las especificaciones.
Pase un indicador de prueba por la punta del husillo para comprobar el desplazamiento. Si la lectura varía más de 0,0008 pulgadas, calce el cabezal. Para comprobar la holgura, mueva un eje con un comando y observe un indicador de carátula en la mesa. Si el movimiento se retrasa o se detiene antes de tiempo, la holgura es alta. Ajuste la precarga de la tuerca de bolas en máquinas pequeñas; en máquinas grandes, añada una compensación del error de paso al control.
Toque la punta del husillo. Debe sentirse tibia, no caliente. Un aumento de 1 °C (30 °F) sobre la temperatura ambiente es una advertencia. Revise el flujo de refrigeración, la tensión de la correa y la carga de la herramienta. En rodamientos engrasados, un exceso de grasa también puede causar calor. Si la temperatura sube a pesar del buen flujo, planifique un cambio de rodamiento.
Los husillos de bolas necesitan una fina película de aceite. Si las líneas de lubricación se obstruyen, el husillo se seca y se desgasta rápidamente. Retire las líneas, enjuague con disolvente limpio y purgue con aceite nuevo. Cambie los limpiadores cada seis meses para evitar la entrada de virutas.

Use una lupa de 10 aumentos. El desgaste normal del flanco se manifiesta como una zona brillante en el borde. El astillado significa que el borde se rompe en pequeños trozos. La rotura se produce por un chasquido completo. Las causas incluyen:
● La velocidad es demasiado alta para el grado de carburo.
● La alimentación es demasiado ligera para que la herramienta roce en lugar de cortar.
● Cortes interrumpidos que impactan el filo.
Reduzca la velocidad del husillo un 10 %, aumente el avance un 5 % y utilice una calidad más tenaz si el astillado se repite. Siempre retire las virutas con refrigerante.
El descentramiento desgarra el metal. Mida el descentramiento radial con un indicador de décimas. Si es superior a 0,0002 pulgadas, limpie el cono, cambie el tirador o deseche el portaherramientas. Si el acabado persiste opaco, añada una segunda pasada de desbaste para que la herramienta de acabado reciba una carga de viruta uniforme.
Calcule la superficie en pies (SFM) y la carga de viruta antes de iniciar el ciclo de prensado. Una fresa de ½ pulg. en aluminio 6061 suele requerir 800 SFM y 0,004 pulg. por diente. Para ranurar, reduzca el avance a la mitad. Utilice una tabla de avance y velocidad o una calculadora en línea; no adivine.
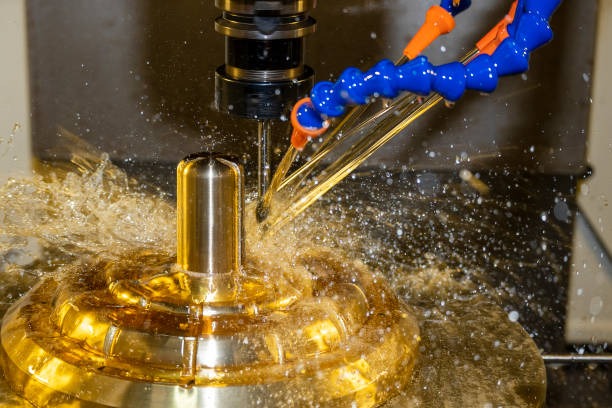
Las virutas fibrosas envuelven las herramientas, retienen el calor y rayan las paredes. Programe un ciclo de picoteo en brocas de más de tres diámetros de profundidad. Añada refrigerante a través de la herramienta o aplique un chorro de aire. Limpie los filtros del depósito de refrigerante semanalmente; muchos talleres omiten esta sencilla tarea.
Un decimal faltante en X0.1 se convierte en X1.0 y arruina el trabajo. Siempre vuelva a trazar el código en el paquete CAM. Luego, ejecute la primera parte sobre el stock con un solo bloque y una anulación rápida al 5 %. Observe cada línea.
Cada control necesita una publicación que coincida con su sintaxis. Una publicación Fanuc puede enviar códigos que la máquina entiende, pero un control Siemens o Mazak los interpretará incorrectamente. Mantenga la biblioteca de publicaciones actualizada. Verifíquela después de cada actualización importante de CAM.
Ajuste las compensaciones de trabajo con un palpador siempre que sea posible. Los palpadores de aristas manuales funcionan bien, pero se cometen errores. Tras el retorno al origen, mueva lentamente cada eje hasta el límite y compruebe si se detiene suavemente. Si el impacto es fuerte, es necesario ajustar la posición de origen. Algunos controles permiten restablecer el desplazamiento de la cuadrícula con un menú sencillo.
Haga una copia de seguridad semanal de los parámetros, las variables macro y los programas en una memoria USB. Guarde una segunda copia en un lugar externo. Si la memoria se satura, agradecerá haber dedicado cinco minutos extra.

Una alarma de servo suele indicar sobrecorriente o sobretensión. Revise el código LED del variador. La mayoría de los fabricantes imprimen su significado en la cubierta del variador. Si la corriente es alta, busque un eje atascado o un cable del motor en cortocircuito. Si el voltaje es alto, la resistencia de regeneración podría estar abierta.
Los codificadores envían la posición mediante cables blindados. Los blindajes sueltos actúan como antenas. Coloque las líneas de alimentación del motor y del codificador en conductos separados. Reemplace los conectores impregnados de aceite. Si los errores solo aparecen cuando circula el refrigerante, revise si hay condensación en los extremos del cable.
El control envía una trayectoria objetivo. Si el eje se retrasa más del límite de error, el variador falla. Las causas incluyen guías secas, acoplamientos desgastados o baja ganancia del servo. Engrase las superficies de las guías, apriete los acoplamientos y, a continuación, ejecute una rutina de autoajuste si el control la ofrece.
Tras un cambio de motor o variador, realice una prueba de pasos. Observe el gráfico de posición. Una buena melodía alcanza el comando rápidamente, se detiene sin rebotes y se mantiene estable. Aumente la ganancia proporcional gradualmente hasta que se observe un ligero sobreimpulso; luego, reduzca la ganancia. Añada la ganancia integral para eliminar el error de estado estable. Documente los valores finales.
Una barra de tiro atascada con la empuñadura a medias suele indicar falta de aire. Revise el regulador. Debe coincidir con la presión indicada en la hoja de especificaciones del husillo, generalmente de 85 a 90 psi. Reemplace los filtros que presenten óxido o agua. Use secadores de aire en climas húmedos. Perforar agujeros a alta velocidad es fácil con... Taladradora CNC, construido para ciclos cortos y virutas limpias.
Las abrazaderas hidráulicas necesitan tiempo para alcanzar la presión establecida. Si un cambiador de paletas se detiene a mitad de giro, revise la válvula de ventilación lenta. Si el aceite tiene un aspecto lechoso, se ha mezclado con agua. Cambie el aceite y repare el respiradero.
Cambie los filtros de aire cada 1000 horas de corte. Marque cada cambio en la carrocería con un rotulador. Revise los reguladores para detectar deslizamientos; si la presión de salida aumenta al detenerse el flujo, el asiento tiene fugas. Reemplace el regulador antes de que dañe las juntas aguas abajo.
La mayoría de los controles estiman la vida útil de los componentes electrónicos a 35 °C. Por encima de ese valor, la vida útil del condensador disminuye. Instale un pequeño aire acondicionado de gabinete si el taller suele experimentar altas temperaturas. En talleres fríos, se forma condensación cuando las máquinas se calientan. Deje el ventilador del husillo funcionando después de apagarlo para secar la humedad.
Un martillo de forja, una punzonadora o incluso un pasillo concurrido pueden hacer vibrar un molino de alta precisión. Compruebe la vibración con un sismómetro de piso. Vierta una almohadilla aparte o añada aisladores de goma si los niveles superan los límites del fabricante.
Los registros de accidentes muestran que un nuevo empleado suele provocar la primera colisión en un plazo de 90 días. Utilice un "día de observación" donde un aprendiz observe a un operador experimentado escribir compensaciones y cargar herramientas. Realice cursos de actualización de habilidades trimestralmente. Un operador con confianza detecta los pequeños problemas a tiempo. Máquina de grabado y fresado Combina un trabajo de detalles finos con un fuerte poder de eliminación de metal en una sola unidad.
Conecte acelerómetros al husillo, los rodamientos y el motor. Lecturas de tendencias. Un aumento en la velocidad general o un pico en la frecuencia de paso de un rodamiento le avisa con meses de antelación. Programe la reparación en lugar de reaccionar.
Una cámara infrarroja portátil marca los puntos calientes en motores, disyuntores y rodamientos. Tome imágenes una vez al mes. Un nuevo punto caliente de más de dos pulgadas cuadradas significa que debe actuar de inmediato.
Envíe muestras de aceite de husillo a un laboratorio. Un alto nivel de hierro indica desgaste. El contenido de agua debe mantenerse por debajo de 500 ppm. Para el refrigerante, mantenga la concentración dentro del rango indicado por el fabricante, generalmente entre el 6 % y el 10 %. Controle el pH; un pH bajo se oxida y un pH alto daña la piel.

Los controles modernos transmiten datos por Ethernet. El software del panel de control registra el tiempo de actividad, la velocidad de alimentación y las alarmas. Resalta las fallas recurrentes para que usted se concentre en reparaciones importantes. Algunos sistemas envían alertas de texto para que el turno de noche pueda responder con rapidez.
● A diario: Limpie las ventanas, quite los rayones, verifique el nivel de aceite, drene el agua de la línea de aire.
● Semanalmente: Limpie los filtros del tanque de refrigerante, pruebe el ventilador del husillo, inspeccione los limpiaparabrisas.
● Mensual: Extraiga datos de vibración, haga copias de seguridad de los programas y verifique que el eje esté cuadrado con una escuadra de granito.
Coloque listas de verificación cerca de la máquina. Firme y feche cada línea. Los gerentes pueden escanear los registros para detectar las deficiencias.
Almacene correas de transmisión, fusibles, interruptores de límite, un ventilador de repuesto y un servoamplificador. Etiquete cada pieza con el modelo de la máquina y el conjunto de parámetros si es necesario. La rotación de primera entrada, primera salida evita que las piezas se deterioren en el estante.
Tras cada fracaso, reúna a la tripulación. Haga tres preguntas:
1. ¿Qué falló?
2. ¿Por qué falló?
3. ¿Cómo podemos evitar que se repita?
Actualice las hojas de trabajo estándar. Capacite al personal sobre el cambio y registre la fecha de revisión.
Las máquinas CNC combinan mecánica precisa, software inteligente y electrónica de alta calidad. Cada elemento puede fallar, pero cada uno deja pistas claras para el ojo experto. Trabaje con seguridad, recopile información, localice la causa raíz, repárela y registre la lección aprendida. Combine las tareas básicas de mantenimiento con herramientas predictivas modernas y convertirá los accidentes en eventos poco frecuentes.